Starting a Shopify store takes about 30 days of part-time work if you do it properly. Spend week one on your plan, plan choice and theme; week two on products, pages and policies; week three on payments, shipping and a customer support channel; and week four on test orders, basic SEO and launch. Don't install a pile of apps on day one.
I talk to new Shopify merchants every week, and the stores that struggle in month two almost never failed because of the theme. They failed because nobody could get an answer to "do you deliver to my city?", the returns policy was a template nobody read, or COD orders were shipping to people who never meant to buy.
This is the plan I'd follow if I were starting a Shopify store today. It assumes you're selling physical products, you're doing it mostly yourself, and you might be in a market where customers expect WhatsApp and cash on delivery.
Before day one: what do you need ready?
You don't need much, but have these to hand:
Five to ten products you can actually ship, with photos.
A business name, and ideally a matching domain you can register.
Your business address and tax details for your country.
As of November 2026, Shopify's pricing page lists a 3-day free trial, followed on most plans by $1 a month for the first three months. After that, the plans are:
Start on Basic. You can upgrade when you need lower card rates or more staff accounts, and you'll know more about your business in three months than you do today. Prices are in USD and Shopify shows local pricing in some regions, so check the page yourself before you commit.
Days 2–3: Store details and domain
In Settings, fill in:
Store name, contact email and business address. Your address appears on invoices and some policies.
Store currency. Pick the currency you'll be paid in. Changing it after your first orders is a pain.
Order ID format. Small thing, but a prefix like NS-1001 makes support conversations easier.
Then connect a domain. Buy it through Shopify or connect one you own. Use a short, brandable name rather than stuffing keywords in.
Days 4–7: Choose a theme and set up the basics
Pick a free Shopify theme. Seriously. Shopify's free themes are fast, maintained and good enough for most new stores. A paid theme won't fix weak product photos.
Set up:
Logo, colours and fonts. Keep it simple and readable on a phone.
Header menu: Home, your two to four main collections, About, Contact.
Footer: policies, contact details, social links.
Mobile first. Check every change on your phone. Most of your traffic will be mobile, especially if it comes from Instagram, TikTok or WhatsApp.
Week 2 (days 8–14): products, pages and policies
Days 8–11: Add products properly
This is where to spend real time. For each product:
Title: what it is, clearly. "Sage Linen Wrap Dress", not "Summer Vibes Dress 🌿".
Photos: at least four. Front, back, detail, and one in use or on a person. Natural light beats a bad studio.
Description in your own words. Never paste supplier copy. Cover what it is, who it's for, materials, size and fit, care, and what's in the box.
Variants for size and colour, not separate products.
Price, compare-at price only if it's a genuine previous price, cost per item (so Shopify can show your margins), SKU and inventory.
Product category from Shopify's list, plus product type and a few tags.
Search engine listing: a short title tag and meta description.
Then group products into collections. Start with two to four. "Linen Dresses", "Linen Shirts", "Best Sellers" is plenty for a small store.
Days 12–13: Write your pages
You need four pages before launch:
About: who you are, where you're based, why you started. Real names and a real photo build trust far more than a stock image.
Contact: email, WhatsApp number, hours, and how fast you reply.
Shipping: where you ship, how long it takes, what it costs, whether COD is available.
FAQ: the ten questions you'd expect. You'll rewrite this after a month of real questions.
Day 14: Set up your policies
In Settings > Policies, Shopify lets you add a return and refund policy, privacy policy, terms of service, shipping policy and contact information, plus a legal notice and subscription policy if you need them. According to the Shopify Help Center, the return and refund policy, terms of service, shipping policy and contact information can be generated automatically from your store settings, and the privacy policy has its own automated settings.
Use the automation as a starting point, then read every line. Your returns policy in particular should say, in plain words:
How many days customers have to return.
What condition items must be in.
Who pays return shipping.
How refunds work for COD orders (bank transfer? store credit?).
How to start a return. ("Message us on WhatsApp with your order number" is a perfectly good answer.)
Week 3 (days 15–21): payments, shipping and a support channel
Days 15–16: Payments
The simplest option is Shopify Payments, but it's only available in supported countries. The list includes the US, Canada, Australia, much of Europe, Japan and the UAE, among others. India and Pakistan, for example, aren't on it as of November 2026.
If you can't use Shopify Payments, add a third-party payment provider that works in your country. Shopify's pricing page notes that using a provider other than Shopify Payments can mean an extra Shopify transaction fee depending on your plan, so factor that in.
In many markets you'll also want cash on delivery. Add it as a manual payment method in your payment settings. COD increases orders and also increases fake, impulse and unreachable orders. Plan for that now (see day 19).
Set up shipping zones only for places you can actually deliver to reliably.
Use simple flat rates. "AED 15 standard, free over AED 200" is easy to understand and easy to promise.
Weigh your products and enter weights, even if you use flat rates now.
Write delivery times on the shipping page and product pages. "2–4 business days in the UAE" answers the most common pre-purchase question before anyone has to ask.
Taxes depend entirely on where you and your customers are. Check your local rules or ask an accountant. Shopify's tax settings can calculate a lot for you once you've told it what to collect.
Days 19–21: Set up a support channel (don't skip this)
This is the step most first-time store owners leave for "later", and it's the one I'd argue hardest for. New stores have no reviews and no reputation. The fastest way to build trust is to be easy to reach and quick to answer.
If your customers use WhatsApp, which is most of them in South Asia, the Gulf, Latin America, Indonesia and much of Europe, make WhatsApp your main support channel. Here's the minimum setup:
A business number that isn't your personal phone, so you can hand it to a team member later.
Five saved replies for the questions you know are coming: delivery time, COD, sizing, returns, order status.
A COD confirmation message if you take cash on delivery.
An away message with your hours.
With WhatFlow, you've got two ways to do this:
WhatFlow Chat Automation connects as a linked device, so you don't need a Meta Business account. It's built for small and startup stores that want to get going fast.
WhatFlow WhatsApp Business API uses the official Meta WhatsApp Cloud API, connected through Meta's Embedded Signup from your Shopify admin. You get a shared team inbox with no seat fees, message templates, COD confirmation with reply buttons, order and shipping updates, abandoned checkout messages, saved replies and native Shopify Flow triggers and actions. Every feature is on every plan, including the Free plan, and because it's built on Meta's official API with no per-seat pricing, the same setup still works when you're a 30-person team sending thousands of order updates a day. Meta's own WhatsApp message charges are billed separately from the app.
I've laid out the differences in WhatFlow Chat Automation vs Business API. If you plan to send order updates or COD confirmations at any volume, I'd start on the Business API's Free plan.
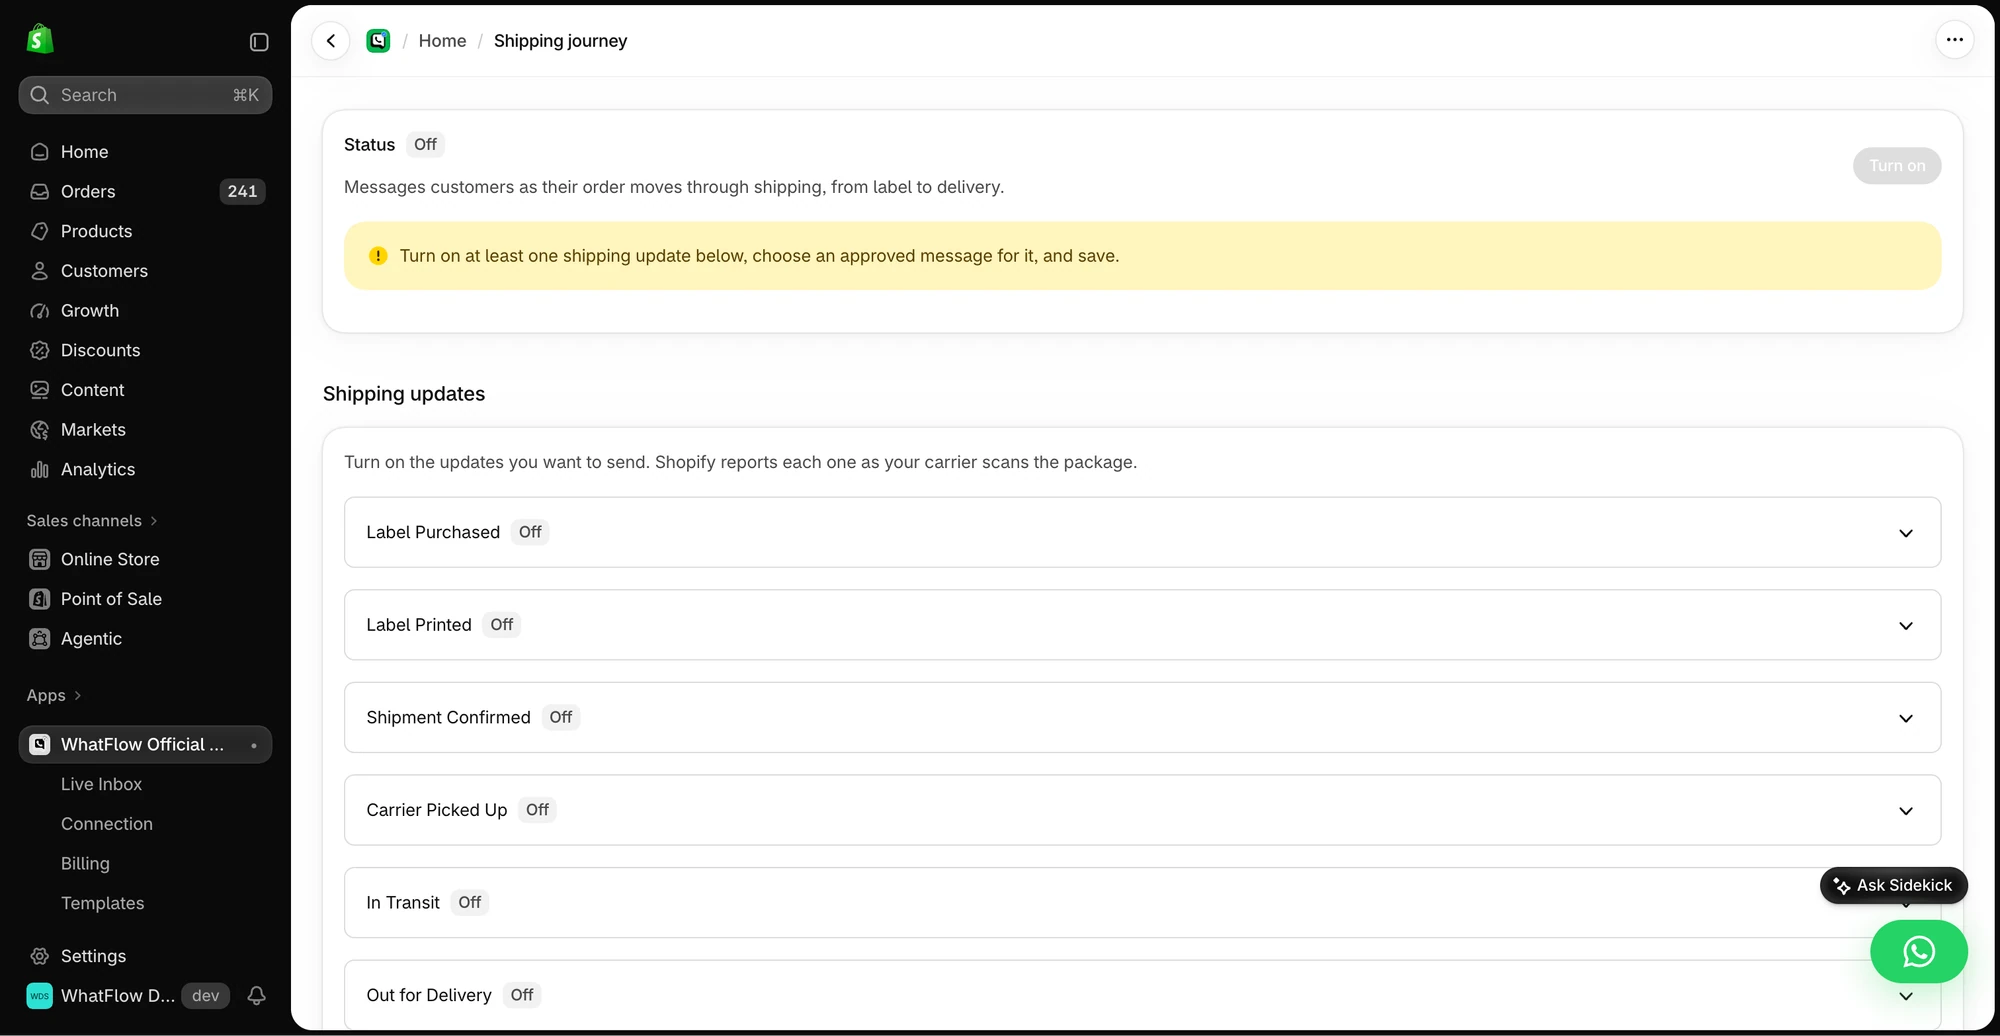
The demo Shipping Journey screen shows the available fulfillment stages. Individual stages need a message before they can be enabled.
Here's a COD confirmation that works well. On the Business API it goes out as an approved utility template with two reply buttons:
Hi Bilal, thanks for your order #NS-1004 from Noor Studio: 1 × Sage Linen Wrap Dress (M), total PKR 6,500, cash on delivery to Gulberg, Lahore. Please confirm so we can ship it today.
[Confirm order] [Cancel]
And a saved reply for the most common pre-purchase question:
Hi! Yes, we deliver across Lahore in 1–2 working days and across Pakistan in 3–5. Cash on delivery is available everywhere. Want me to help you pick a size?
One rule to remember: on WhatsApp, customers need to have opted in before you message them first, and outside the 24-hour window after a customer's last message you can only send pre-approved templates. Meta's WhatsApp Business Messaging Policy has the details.
Week 4 (days 22–30): test, tidy and launch
Days 22–24: Place test orders
Place at least three test orders before launch:
A card or online payment order, using your payment provider's test mode or a real low-value product you then refund.
A COD order, from your own phone, so you see exactly what the customer sees, including your WhatsApp confirmation.
An order to a far-away shipping zone, to check rates and delivery estimates.
For each one, check the order confirmation email, the WhatsApp message (if you set one up), the order in admin, and how you'd fulfil it. Then try to return one. If your own returns process confuses you, it'll confuse customers.
Days 25–26: Basic SEO and analytics
You don't need to be an SEO expert at launch. Do the basics:
Verify Google Search Console and submit your sitemap. Shopify generates it at yourdomain.com/sitemap.xml.
Write title tags and meta descriptions for your home page and collections.
Add alt text to product images.
Write two or three sentences of intro copy on each collection.
Look at every app you've installed during setup. For each one: do I need this before my first ten orders? If not, uninstall it, and check whether it left code in your theme. I've written about building a lean Shopify app stack. A brand-new store usually needs a WhatsApp or chat app, a review app, and maybe one email tool. That's it.
Days 28–29: Final checks on your phone
Go through the store on your phone like a stranger would:
Can you find the delivery time without searching?
Is the returns policy one tap away?
Does the WhatsApp button work and open the right number?
Do product photos load quickly on mobile data?
Does checkout show the right shipping options and COD?
Ask two friends to do the same and tell you where they hesitated.
Day 30: Launch
Remove the password. In Shopify admin, go to Online Store, switch from private to public, and choose Launch store, as described in Shopify's help page. On the mobile app you may be asked to pick a paid plan or add a business address first.
Then tell people. Your first customers are almost always people who already know you: friends, followers, your WhatsApp contacts who've agreed to hear from you. Don't blast your whole phonebook. Message people individually, ask for honest feedback, and make it easy to reply.
The 30-day checklist
Week
Task
Done?
1
Plan chosen, store details and address filled in
1
Domain connected
1
Free theme set up, checked on mobile
2
5–10 products with photos, original descriptions, variants, categories
2
2–4 collections
2
About, Contact, Shipping, FAQ pages
2
Policies set and read line by line
3
Payment provider connected; COD added if needed
3
Shipping zones and simple rates
3
WhatsApp button, business number, saved replies
3
COD confirmation message (if you take COD)
4
Three test orders, including one return
4
Search Console verified, sitemap submitted
4
Unneeded apps removed
4
Store launched and first customers contacted
What happens after day 30?
The first month after launch is mostly about listening. Every question a customer asks on WhatsApp tells you something your store didn't. Fix the product page, update the FAQ, tweak the saved reply.
Templates, COD confirmation, Shopify Flow automations and a shared team inbox with no seat fees. Every feature is included on every plan, including Free.
Most people overthink the theme and underthink the conversation. A plain store that answers every WhatsApp message within the hour will outsell a beautiful one that takes two days to reply. Get the basics in place, launch, and keep talking to your customers.
Frequently asked questions
How much does it cost to start a Shopify store?
As of November 2026, Shopify's Basic plan is listed at $25 a month billed monthly or $19 a month billed yearly, after a 3-day free trial and an introductory $1-a-month offer for the first three months on most plans. Add a domain, any paid apps and payment processing fees; many new stores launch with a free theme and mostly free apps.
How long does it take to set up a Shopify store?
You can technically publish a store in a weekend, but a store that's ready for real customers, with proper product pages, policies, payments, shipping and a support channel, usually takes two to four weeks of part-time work.
Can I offer cash on delivery on Shopify?
Yes. Shopify lets you add cash on delivery as a manual payment method. Many stores in COD-heavy markets also send a WhatsApp message asking the customer to confirm the order before it ships, which cuts down on fake and impulse orders.
Do I need Shopify Payments?
No, but it's the simplest option where it's available. Shopify Payments only works in supported countries; elsewhere you'll use a third-party payment provider, and Shopify may charge an additional transaction fee depending on your plan.
What should I do first after creating a Shopify store?
Fill in your store details and business address, pick a free theme, and add five to ten products properly before touching apps. Apps can wait until you know which gaps you actually have.